700 Square Feet of Sculptures

Ahhh, good old aluminum foil. No tinker’s workshop is complete without a roll of at least one of the elements on the periodic table.

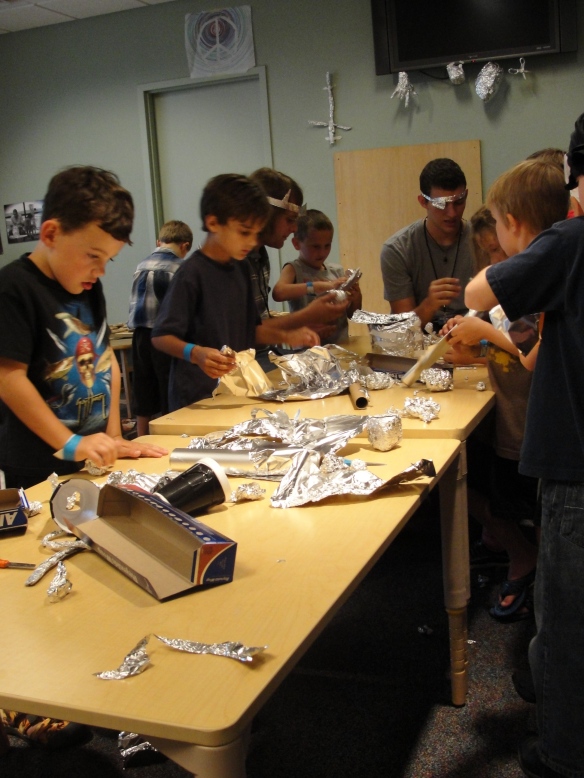
Here at the DHDC, we’ve been using the materials from the Guild to spark visitor interactions. This week, our explainers have been busy sharing aluminum foil pieces with museum guests and asking the open-ended question “What can you make?”

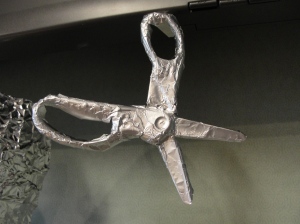
This was so popular with the explainers that it quickly became a regular occurrence in our Science Cafe, where visitors used table space to craft their little hearts out. Some visitors could be persuaded to leave their creations with us so we could put them on display, so a wall of fame was born.

And it grew and grew.

I showed some children how to “cast” items in aluminum by pressing the foil over a surface.

Some children found interesting things to cast.

And those creations turned out to be pretty robust.

Then, the aluminum foil facilitators began to wander around the museum. They discovered that visitors could be coaxed to make aluminum foil T-Rex claws, which prompted many children to play dramatically in our traveling dinosaur exhibit. These wildly slashing dinosaur children turned out to be very difficult to photograph.

Pretty soon, the claws were a meme within the Discovery Center. Now, no matter where we gave the children aluminum foil, they made dinosaur claws for their fingers. Even if we weren’t in the dinosaur exhibit, and even when we didn’t provide instructions on how to make claws, the children made what they saw other children had made.


And they remained just as difficult to photograph as before.

Well, the next day we gave no instruction and returned to saying “What can you make?” We got no dinosaur claws, and everything was a surprise again. Guess what this dude is making:

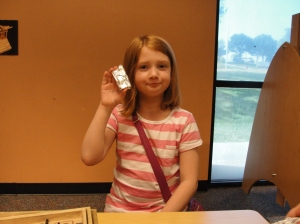
While his sister made a wallet.

The summer camp kids got in on the action. This little gal made a line of accessories to help her dress up like a witch, which included long fingernails and a magical bracelet.

The boy behind her proved you’re never too young to chuck the deuces in the back of a photo. He retrieved his aluminum foil dagger and crown, and an epic battle unfurled.

This raged on for quite some time, and I was lucky to escape without injury while capturing the action.

We learned a lot about facilitating an open-ended creative activity, and we became more aware of how the surroundings often dictate the products our visitors make. I think we’ll continue to work with aluminum foil to hone these skills in the coming weeks.

Foiled Again! Again!

Man, museum educators much be a bunch of hungry, hungry hippos.  I’ve seen a definite theme in this week’s challenge, and it sure looks delicious!  Since I hadn’t looked at the website before embarking on my own exploration, I was pleasantly surprised to see that a lot of folks were also thinking about foil as a cooking material.

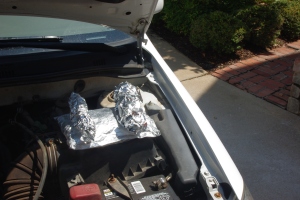
My husband Daniel and I have often talked about cooking food while driving long distances.  Evidently a large community of people online also share this curiosity: they have published their perfected means of cooking on the road.  Some strap foil packs to motorcycle exhaust pipes, while others use the car cab as a giant solar cooker.  We opted for another method: cooking on our 2002 Corrolla’s engine block.

First, we made a pouch with three layers of foil.  I rolled the sides up really well to ensure liquids couldn’t escape.

We opted for chicken filets, frozen peas, and onion as ingredients.  I’d suggest using foods with a large margin of error; our onions were a little underdone by the time we finished our project.  Frozen vegetables work very well!  Pre-cooked meats or small portions of raw meat would be best, if you’re an omnivore like us.  We lightly coated the ingredients in olive oil and seasoned with salt and pepper.

Be very sparing with your liquid content!  We had a sauce for the chicken that we wanted to use–it came in an individually sealed plastic sack.  Since we were really worried about liquid seeping out and burning off on the exhaust manifold, we kept the sauce in the plastic and stuck it into the packet wholesale to avoid seepage.

Next, you need to figure out where to place your fancy foil packet.  Since we couldn’t locate an infrared thermometer, we used the next best thing: spit and a finger.  After singing my fingers several times, I (eventually, after driving an hour only to find a cold pack of meat) found that the exhaust manifold was the optimal spot on Ol’ Faithful’s block.

The above photo is of the first, failed spot for the pack.  I originally chose the “air cleaner” for a cooking surface because it sat higher than the manifold.  I wanted to really squish the food into place so it wouldn’t slide out at 80 miles an hour.  As noted above, halfway through our drive we discovered it to not be a great conductor.  Truth be told, it made me feel better about the construction of our Toyota!

On top of the pack, we made large, loosely wadded-up balls of foil.  The idea is that once you slam the hood, the balls will squish down and hold the meat in place.  If you’re really nervous, make a foil cone to place on your surface.  Slam the hood on the cone and use its height to determine how large your foil balls need to be.  Your pack and foil balls need to be as high or higher than the profile of the squished cone.

Once in place, drive!  Our meat finished cooking after about an hour of highway driving.

Delicious, delicious results.

Engine block cooking is a great way to make lunch and benefit from the co-generative properties of a somewhat inefficient machine.  On an upcoming trip to Amarillo (hello, DHDC!), we’re going to make hot dogs and try to find a way to toast buns.  That is, if we aren’t too full from steak at the Big Texan.

Let me know if you try this project!

-Adrienne from the Oklahoma Museum Network

Spinning Marbles

Sooo… this is what happens when I am left alone with marbles and glue.

Please forgive the dusty table, and the cat in the background.  At least he didn’t try and jump in to help. The four marble top will actually turn itself over to spin on one marble if you spin it fast enough, you can see the very first try on the video didn’t work.  I didn’t want to try again faster because it might dent the wood table.  So I went ahead and spun it on the single marble to show.

Lesson learned from this:  Make sure the superglue is completely dry before you spin the top, otherwise superglue will be flung all over you, the counter and anything else in the vicinity.  Next time, I’ll use hot glue.


Marble Art

Hi everyone, I’m Isabel from ScienceWorks Museum in Ashland, Oregon. I’m dedicating this post to my mom, from whom I stole this idea. Isn’t that what role models are all about?

1. Collect your materials.

stuff you'll needYou’ll need some paints, a piece of paper, tape, small containers to put the paint in, newspaper to protect the conference room table (ahem), paper towels to clean up, and a large container that the paper fits in (I used the white tub in the picture; with kids, it can be a good idea to use something like a cereal box that can be closed up to prevent flying marbles). Don’t forget the marbles!

2. Tape the piece of paper to the bottom of the large container.

good thing it fits!3. Select your paint colors and dispense them into the small containers.

pretty...4. Plop the marbles into the paint.

hexagons and spheres, oh my!5. Roll the marbles around so that they are totally covered in paint.

mmm, painty marbles6. Toss the marbles into the container with the paper.

almost ready to roll!You can tell that this tub has a somewhat convex bottom. But don’t we all?

7. Tilt the container so the marbles roll all around the surface.

awesomeThis is the fun part. If you have a box with a lid, you can even shake the whole thing. (With that method, the art comes out as a surprise, which can be a nice touch.)

8. Take out the marbles, untape the paper, and lay it flat to dry.

by Jackson PollockI used tempera paint and printer paper. My mom used fabric paint (or something else more permanent than tempera) and instead of paper, she used an old LP record. They looked really cool, especially with metallic paints.

As for the science: Do larger marbles make different trails than smaller ones? What happens if you move the container quickly or slowly, at a greater or lesser angle? Why are the paths parabolic?

pretty neat, no?You can also go the arty route and talk about Jackson Pollock and other abstract artists. All in all, it’s pretty fun. Thanks Mom!

Bubble Explosions!

The following post was written by Chip Lindsey, from Science Works in Ashland, Oregon.
A hydrogen tank and regulator can create some interesting experiences with bubbles. Filling bubbles with pure hydrogen and setting them ablaze is relatively safe.  The hydrogen burns rather than explodes, producing beautiful mushroom-shaped fireballs.  If a hydrogen-filled bubble lingers for long, air begins to mix with the hydrogen through osmosis creating increasingly more explosive mixtures of gas inside the bubble.

Bubbles that escape, rise quickly upward, demonstrating the lifting potential of the lightest element.

Worth a Try

Not all experiments succeed. A couple years ago several bubble experts visited the Exploratorium to discuss very important bubble issues, run some intriguing trainings for the Explainers, and make an attempt at setting the Guinness world record for the largest bubble. We spent all morning in parking lot cheering them on, but alas, they couldn’t break the record. Was it still worth it? Of course! We all had an amazing time blowing enormous bubbles.

Also, just in case you are curious, the largest free floating soap bubble ever blown was 483 square feet. If it was a perfect sphere that would be about 10 feet wide. Although you make have noticed that super big bubbles are not very spherical compared to small bubbles.

[photos courtesy of the Explainer blog]